Skid Steer Wrap Installation: What to Expect and How It Works
If you are considering wrapping your machine, one of the first questions you probably have is what the skid steer wrap installation process actually looks like.
The good news is that modern wrap kits are designed to be straightforward, efficient, and realistic for owners, contractors, and dealers to install without special equipment.
This guide breaks down how skid steer wrap installation works, what to expect during the process, and how to get the best results.
What a Skid Steer Wrap Installation Involves
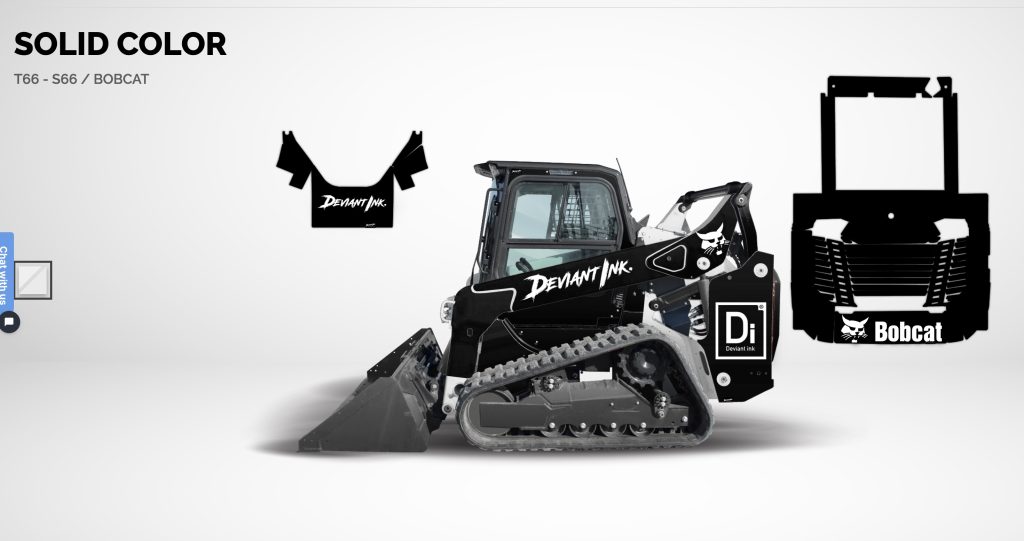
A skid steer wrap installation uses pre-cut vinyl panels designed specifically for your machine. Each piece is sized to fit individual panels, doors, and contours.
This means you are not trimming vinyl by hand or guessing where cuts should go. The wrap kit arrives ready to install.
How Long Skid Steer Wrap Installation Takes
Most skid steer wrap installations take around two hours from start to finish.
Time can vary depending on the size of the machine, experience level, and install environment.
Because the panels are pre-cut, the process is much faster than traditional vinyl wrapping.
Tools Needed for Installation
You do not need professional shop equipment to install a skid steer wrap.
Basic tools include a squeegee, clean microfiber towels, isopropyl alcohol for surface prep, and a heat gun. We do not recommend using a torch during installation.
The heat gun is used only after all panels are fully installed and aligned.
Surface Prep and Stock Stickers
Before installing the wrap, clean the machine thoroughly to remove dirt, grease, and debris.
If your machine still has stock stickers, you have two options.
- Remove the factory stickers for the cleanest final look
- Leave them on, knowing there may be a faint outline visible under the wrap
Both options work. Removing the stickers simply creates the smoothest finish.
Installing the Wrap Panels
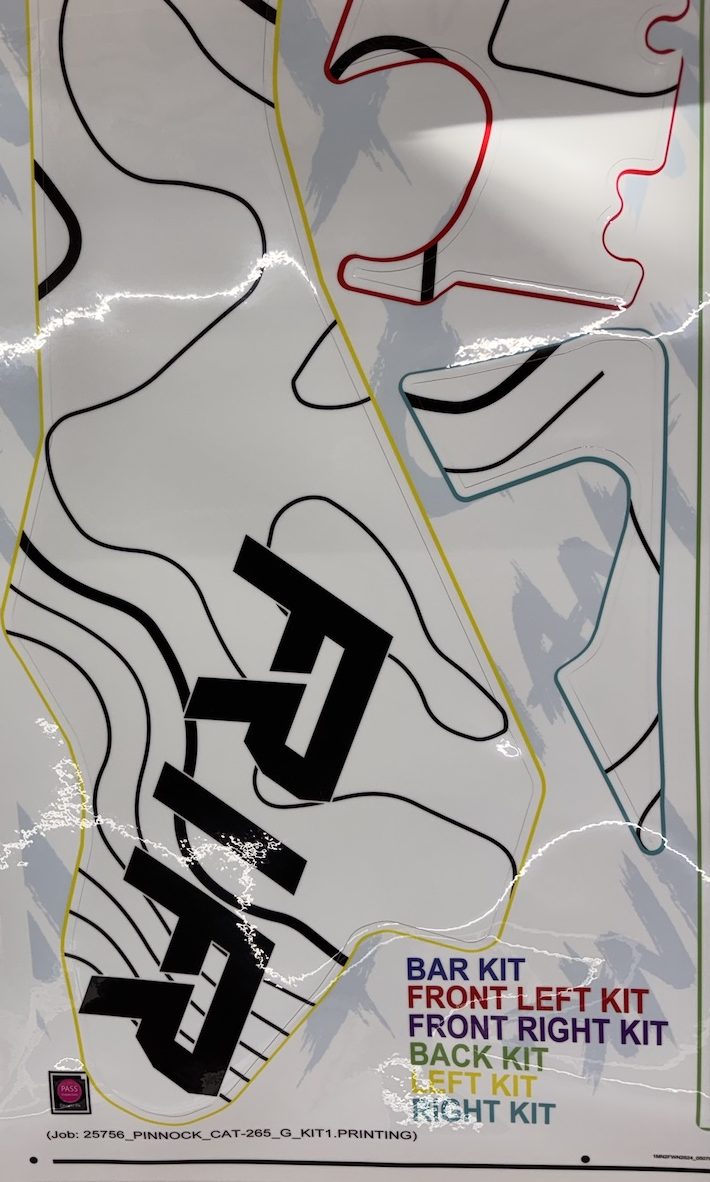
Each wrap kit includes a colored outline guide printed directly on the vinyl. This guide shows exactly where every panel should sit on the machine.
There is no required panel order. Panels can be installed in any sequence.
You can place, remove, and reposition panels multiple times until everything lines up correctly. It is normal to adjust panels during installation to get the best fit.
Using Heat During Installation
Once all panels are installed and aligned, that is when the heat gun is used.
Heat helps the vinyl relax, conform to edges, and fully bond to the surface. Applying heat at the end locks everything into place.
Install Environment and Set Time
We recommend installing wraps indoors in a warm environment whenever possible.
After installation, allow the machine to sit for up to 24 hours before heavy use. This gives the wrap time to fully settle and adhere, especially around edges and contours.
Final Thoughts on Skid Steer Wrap Installation
Skid wrap installation is designed to be simple, repeatable, and realistic for real jobsite use.
With proper prep and a pre-cut wrap kit, most machines can be wrapped in a single afternoon and put right back to work.
Start building your wrap now: https://deviantink.com/view/CONSTRUCTION