MODULE ONE: Intro to the Customizer tool

wrap builder account


First time using our customizer? Start here.

Module 1 gives you a full walkthrough of how to design your own wrap from start to finish using the Deviant Ink online tool. Whether you’re wrapping a sled, dirt bike, UTV, or Jet Ski, this guide will show you how to bring your vision to life.

You’ll learn how to:

  • Create a free account to save and share your builds

  • Select your machine, manufacturer, and chassis

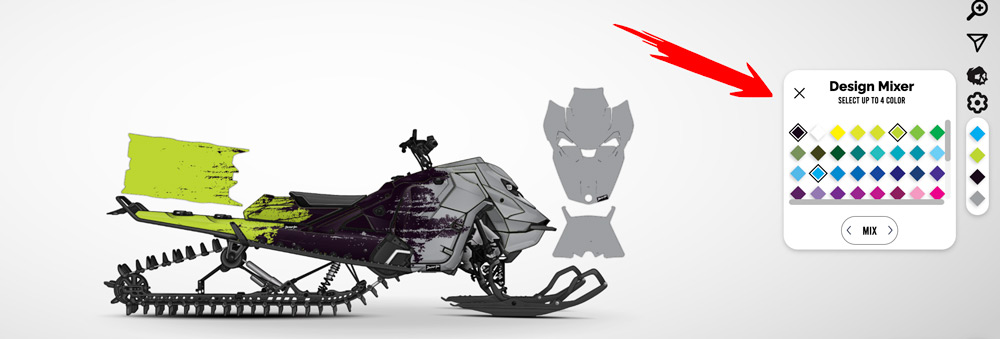
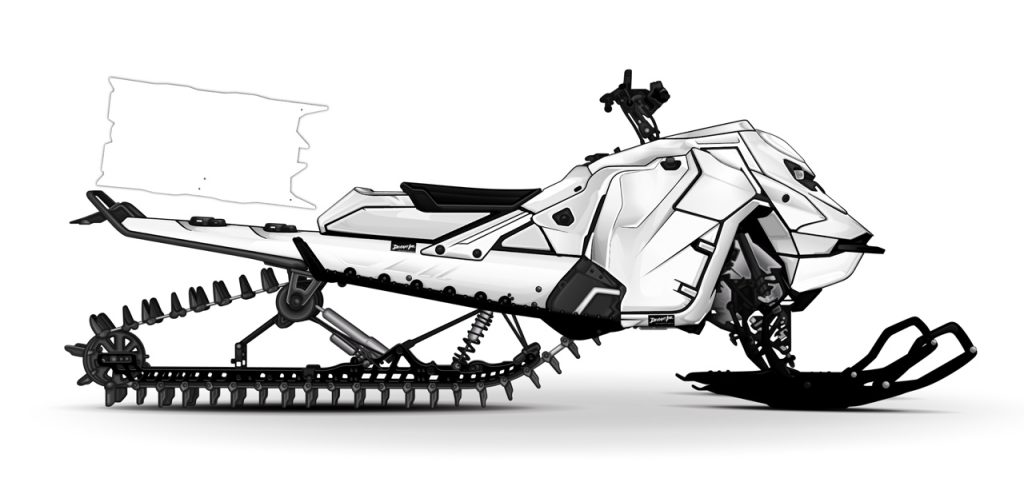
  • Browse designs, customize colors, and match your machine’s accents

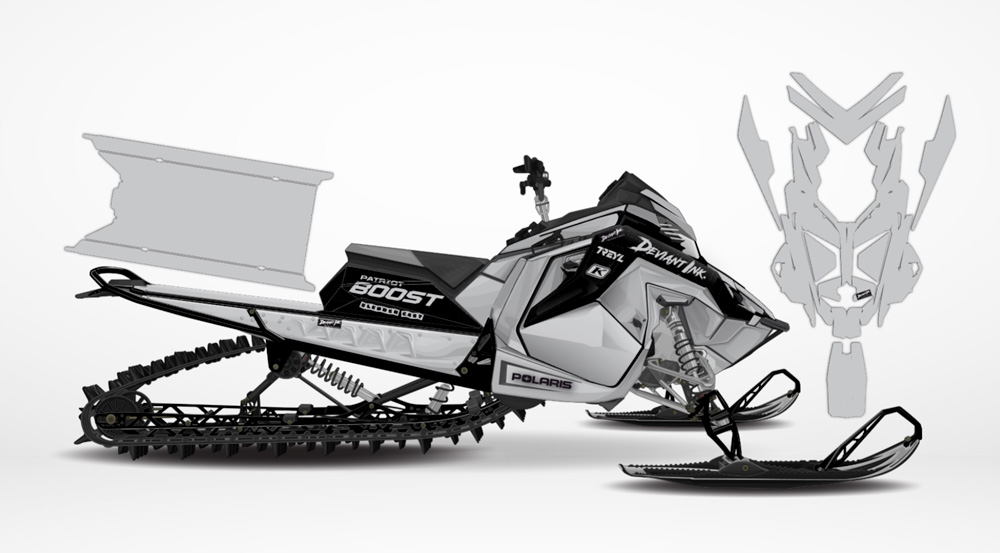
  • Add logos, personalization, and choose your vinyl overlay finish

  • Select your exact year/model so we can generate a final mockup for approval

By the end of this module, you’ll be ready to build with confidence, knowing exactly how the tool works and how to get the cleanest result.

Start Module 1 and see just how powerful the Deviant Ink customizer really is.

MODULE TWO: DIAL IN YOUR COLORS

Colors can make or break your wrap. Module 2 shows you how to get it right the first time.

From understanding how your base plastics affect the final look to choosing killer color combos that actually work, this module is all about building a wrap that looks intentional and dialed.

Inside Module 2, you’ll learn:

  • Why base plastic and tunnel colors matter when designing a wrap

  • How to blend multiple stock colors using design strategy

  • Pro tips for picking color combos that hit hard

  • How to use Deviant Ink’s powerful new tools: the Color Mixer and Design Mixer

If you’ve ever second-guessed your color choices or struggled to get the look in your head to match what you see on screen, this module is for you.

Start Module 2 and get your color game locked in.

MODULE THREE: GET YOUR DESIGN RIGHT


Not sure where to start when it comes to designing your wrap? Module 3 walks you through how to get crystal clear on your style before you ever click “customize.”

This is where you’ll learn how to:

  • Choose your design direction, whether you like it clean, wild, or somewhere in between

  • Use filters to quickly find wraps that match your machine and vibe

  • Save your favorite builds and organize your designs for later

By the time you’re done, you’ll know exactly how to approach your build without wasting time or second-guessing your choices.

Start Module 3 now and take the guesswork out of your custom wrap.

MODULE FOUR: LOGO PLACEMENT TIPS


Logos can make or break the look of your wrap. If you’re planning to rep sponsors, brands, or your own crew, this module is for you.

In Module 4, you’ll learn how to place logos with precision so they actually enhance your design, not clutter it.

Here’s what you’ll get:

  • How to scout the best logo locations on your machine

  • A simple trick to visualize logo placement using white panels

  • Why it’s best to start with OEM logos first

  • Pro tips on avoiding awkward cut lines and distorted layouts

  • How to use zoom to double-check placement and sizing

Whether you’re running just a few logos or a full sponsor stack, this module will help you keep everything clean, professional, and well-balanced.

Start Module 4 now and bring your wrap to life with logos that look like they belong.

MODULE FIVE: Choose the Perfect Finish for Your Wrap


Gloss, matte, chrome, holographic—there’s no shortage of options. But which one is right for your build?

In Module 5, we break down every available overlay finish at Deviant Ink and show you exactly how each one looks, feels, and performs. Whether you’re going for clean and subtle or bold and blinding, this guide will help you choose the finish that fits your style.

After this module, you’ll know:

  • The difference between standard, chrome, and holographic finishes

  • How sparkle and gold flake overlays transform your wrap

  • Which finishes are best for your color choices and design

No more guessing. Just clarity, confidence, and a killer finish.