QUICK OVERVIEW

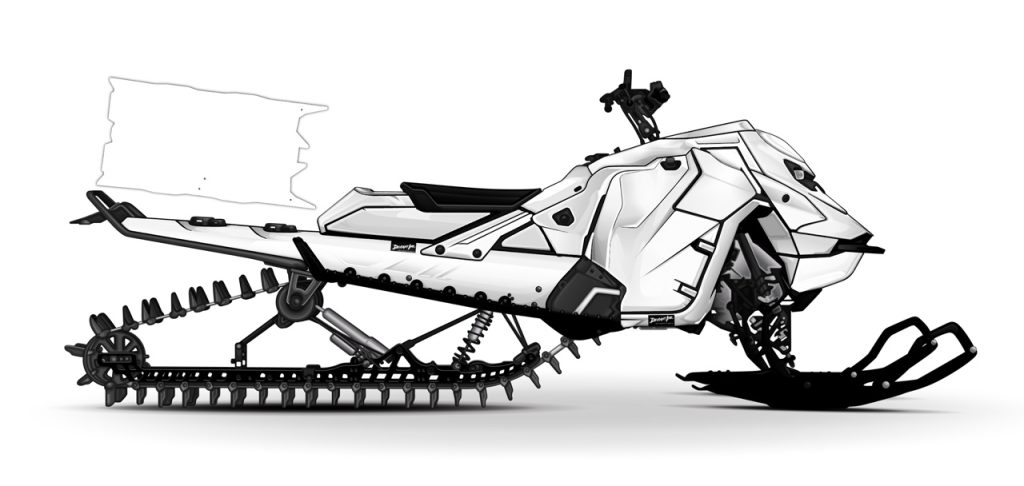
Logos can take your wrap to the next level, or wreck the whole vibe. In this module, you’ll learn where to place logos for the cleanest look, how to prep your design space using the white-out trick, and how to avoid common placement mistakes. If you’re repping sponsors or your own brand, this is a must-view.

STEP 1 – KNOW YOUR MACHINE

If you have your machine nearby, take a thorough walk around and identify the best locations for placing logos.

Focus on flat areas where a logo can be placed without crossing over different panels. While we can place logos across multiple panels, we’ve found that keeping them on a single piece provides a cleaner, more polished look. (more on this below)

If you’re adding manufacturer logos, check the stock positions on your machine to align them seamlessly with your wrap design.

STEP 2 – { TIP } CHANGE ALL WRAP COLORS TO WHITE

Yes, kind of weird right?

However, doing this will give you a better visual as to where the cut lines and angles are at.

All you need to do is change all your accent colors to black, and your wrap colors to white.

Start placing logos, and then add your color back into the wrap.

STEP 3 – ADD YOUR OEM LOGOS FIRST

If you’re planning to include your manufacturer’s logos (like Ski-Doo) in their original locations, go ahead and get those placed first.

Once those are out of the way, you can start adding in your other logos wherever they fit best.

This method helps spread the logos out nicely and keeps everything looking balanced.

STEP 4 – AVOID PLACING LARGE LOGOS OVER LARGE AREAS OF SPACE & MULTIPLE CUT LINES

Yes, it’s possible, and yes, we can do it.

But keep in mind, when you stretch a logo across an entire side panel, you’ll be dealing with various angles, valleys, and cutouts. This makes it challenging to get the logo to align perfectly across all the pieces.

Just something to keep in mind.

STEP 5 – USE THE ZOOM FEATURE

Be sure to use the zoom feature to get a closer look at where you’ve placed your logos.

AND THAT’S A WRAP WITH MODULE 4!

Module 4 offered a quick guide on how to effectively add logos to your wrap design.

Here’s what to look forward to in module 5…
 

  • We’ll go over all the different overlay finishes and provide a nice comparison guide for you.